

Setting up your Yealink MeetingBar doesn’t have to be complicated. Whether you’re configuring the Yealink A20 for small rooms, the A30 for mid-sized spaces, or the A50 for large conference areas, this guide will help you through a smooth Yealink MeetingBar setup from unboxing to your first call. No messy cables, no confusing manuals – just a quick and reliable start to your video meetings. Plus, you can find all the right Yealink accessories, upgrades, and firmware support right here at our trusted online store in the USA.
What This Guide Will Help You Complete:
This step-by-step blog will:
- Deliver a clear Yealink MeetingBar installation process.
- Guide you through initial configuration, including Zoom Rooms and Microsoft Teams setup.
- Help you position the Yealink MeetingBar for optimal camera, audio, and microphone performance.
- Offer guidance on accessories and firmware updates to ensure maximum functionality.
Supported Models:
This Yealink MeetingBar setup guide is designed for a wide range of smart video conferencing bars that deliver premium collaboration experiences for modern workplaces. Whether you’re equipping a huddle room, mid-sized conference space, or a large boardroom, Yealink has the perfect solution for every environment.
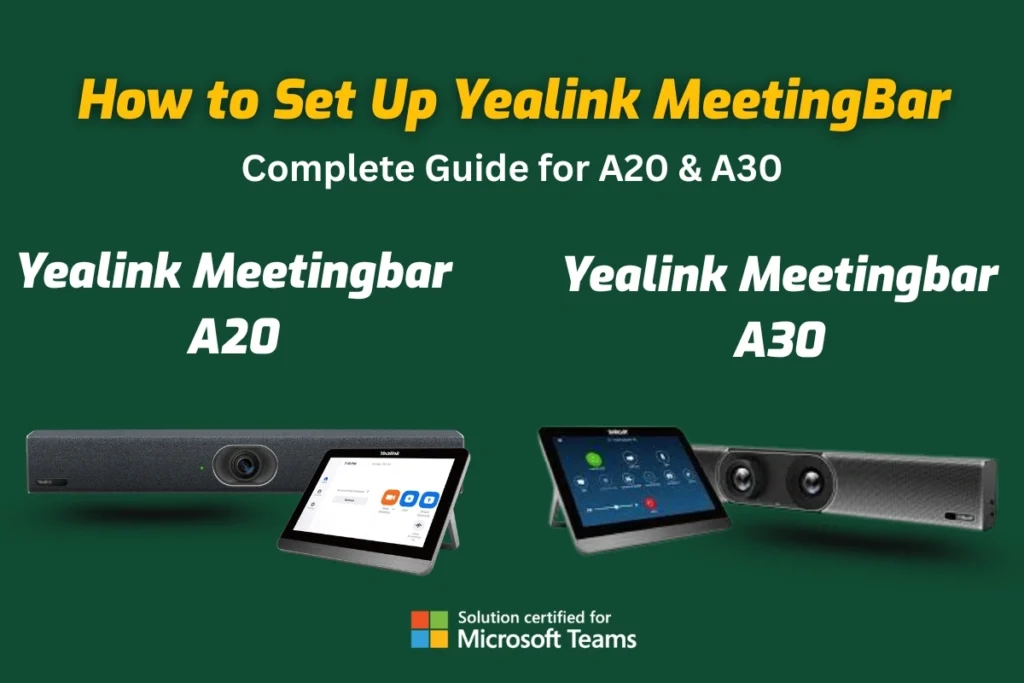
- Yealink MeetingBar A20 – Perfect for small meeting rooms and huddle spaces, the A20 combines a 20MP camera, AI framing, and integrated audio to give your team crystal-clear communication with minimal setup. Its compact design and all-in-one build make it a favorite among startups and remote teams looking for a plug-and-play solution.
- Yealink MeetingBar A30 – Built for medium-sized conference rooms, the A30 takes collaboration to the next level with dual cameras, advanced speaker tracking, and Microsoft Teams and Zoom compatibility. It’s ideal for businesses that want a perfect video experience without needing a separate PC or complicated configuration.
- Yealink MeetingBar A50 – Designed for medium to large meeting spaces, the A50 is Yealink’s powerhouse. With AI-driven video technology, ultra-wide FOV, and superior sound pickup, it delivers a professional-grade conferencing experience that scales with your organization’s needs.
💼 Get your Yealink MeetingBar today at Spoglink — experience seamless Android integration, smarter meetings, and a consistent setup across every room.
What Comes with Your Yealink MeetingBar
Before starting the steps on how to set up the Yealink MeetingBar installation process, make sure your package contains all the necessary components.
What should be in the box:
- Yealink MeetingBar (A20, A30, or A50)
- Power adapter
- HDMI cable
- Ethernet cable
- Wall mount or TV mount bracket
- Remote control or Yealink CTP18/CTP20 Touch Panel (if included)
- Documentation and Quick Start Guide
Tip: If you’re operating a Yealink Touch Panel, keep it charged or powered during the setup.
Mounting Your Yealink MeetingBar:
The correct way of installation secures optimal performance of your Yealink video bar.
Mounting Options:
- TV Mount: Use the included TV mount frame and attach the MeetingBar just above or below the screen.
- Wall Mount: Perfect fit for permanent/long-term installations. Use a level to position the bar and anchor it firmly.
Make sure the camera has a clear view of the room and is not blocked by screen edges or lighting fixtures.
Connecting Cables and Power:
Now let’s connect your MeetingBar:
Required Connections:
- HDMI Out: Attach it to your display screen.
- Ethernet: For a steady internet connection (Wi-Fi is available, but wired is preferred).
- Power Adapter: Connect to the closest power outlet.
- USB or Yealink Touch Panel: Connect the Yealink CTP18/CTP20 panel via Ethernet (PoE) or USB, depending on the model.
Once powered on, the Yealink logo should appear on your display screen.
Initial Setup:
After powering up, the system enters setup mode.
Basic Setup Steps:
- Select Language and Region
- Connect to Ethernet or Wi-Fi
- Accept Yealink’s Terms and Conditions
- Choose your preferred platform: Microsoft Teams, Zoom Rooms, or Device Mode
Buy Yealink MeetingBar Now– Fast US Shipping from Spoglink
Setting Up Microsoft Teams and Zoom Rooms:
Depending on your chosen platform, here’s how to proceed:
Microsoft Teams Setup:
- Sign in with your Teams Room account.
- If using the Yealink MeetingBar Teams setup, configure:
- Teams Room License
- Auto-launch options
- Room Name and Calendar Integration
Zoom Rooms Setup:
- Sign in with your Zoom Admin credentials.
- Assign the device to a Zoom Room.
- Customize settings via Zoom Admin Console or directly on the Yealink Touch Panel.
Note: Both Teams and Zoom require pre-configured room accounts with licenses before setup.
Audio and Video Settings:
Maximum audio and video quality is compulsory. Here’s how to fine-tune it.
Yealink Camera Setup:
- Access the Settings > Video section on the device or touch panel.
- Adjust:
- Framing Mode: Speaker tracking, group framing
- Resolution: Set to 1080p or 4K, depending on model and platform
Yealink Microphone Configuration:
- Navigate to Settings > Audio
- Select the preferred mic input (built-in or external)
- Enable Noise Reduction and Echo Cancellation
Yealink Audio Settings:
- Adjust volume levels for the mic and speakers
- Test output and input levels via the test feature in the settings menu
- Use an external mic/speaker setup if the room size demands
Optional Accessories Setup
Yealink presents a field of accessories for enhanced functionality:
Suggested Add-ons:
- Yealink CTP18/CTP20 Touch Panel: For perfect meeting control
- Yealink WPP30: For wireless presentation sharing
- Yealink VCM36-W: Wireless microphones for larger rooms
- Yealink RoomSensor: For environmental sensing and automation
Accessory Setup Tip: Follow pairing instructions specific to each device. Most are plug-and-play through USB or auto-discover over LAN.
Upgrade Your Setup with Official Yealink Accessories – Order Today at Spoglink
Firmware Update:
Updating your system guarantees strength and access to the latest features.
How to Update Firmware:
- Go to Settings > Device Management
- Check for updates via the Yealink Cloud or local USB upload
- Click “Install” and wait for a reboot
Always update the firmware before major arrangements.
Read more about Yealink A20 & A50 MeetingBars Now – Get Fast US Delivery with Spoglink.
Lastly, Testing Your System:
Before going live, perform a full system test:
What to Test:
- Camera feed on display.
- Microphone input via recording or test call
- Speaker output by playing a sample audio
- Touch Panel responsiveness
- Meeting platform sign-in (Teams/Zoom) and calendar sync
Make a test call to confirm functionality.
📌 Customer Success Story: From Setup Struggles to Smooth Meetings
⭐ ⭐ ⭐ ⭐ ⭐ Customer Feedback
“Spoglink’s setup guide made installing our Yealink MeetingBar A20 and A30 a breeze! We had all rooms running with Zoom in no time. Clear audio, zero lags—our hybrid meetings have never been smoother. Thanks for the expert support and fast delivery!”
— James R., Chicago, IL
Conclusion
Positioning a Yealink MeetingBar doesn’t have to be complicated. Whether you’re positioning the A20, A30, or A50, following this guide on how to set up the Yealink MeetingBar system layout guide guarantees a smooth and efficient installation process.
From mounting and powering the device to configuring video and audio, this guide covers it all. Whether you’re setting up Microsoft Teams, Zoom Rooms, or using Yealink in device mode, you’re now equipped with everything needed for a professional-grade experience.
If you’re looking for Yealink supplements, firmware help, or a thorough comparison between Yealink products, check out our related blog below:
Reach out to us and Get Expert Consultation & the Best Deal on Yealink MeetingBars – Shop with Spoglink.
FAQS
1. Can I use the Yealink MeetingBar without a touch panel?
Yes, you can. While the Yealink CTP18/CTP20 touch panel makes navigation and meeting control easier, the MeetingBar can still be operated with its remote control or via your chosen platform (Teams or Zoom).
2. Do I need a professional installer for Yealink MeetingBar?
Not necessarily. Yealink MeetingBars are designed for easy DIY installation. Most small and mid-sized businesses set them up in under an hour by following the official guide or reaching out to our experts for guidance. However, for large deployments across multiple rooms, professional installation may save time.
3. What platforms are officially supported by Yealink MeetingBar?
The Yealink A20, A30, and A50 come optimized for Microsoft Teams, Zoom Rooms, and Device Mode (BYOD). Future firmware updates may expand functionality, so keeping your device updated ensures compatibility.
4. How many participants can Yealink MeetingBars handle?
It depends on the model.
- A20: Best for huddling and small rooms (up to 6 people).
- A30: Ideal for medium rooms (8–12 people).
- A50: Built for larger meeting spaces (12+ people).
5. Can I expand the audio coverage of a Yealink MeetingBar?
Yes. By adding wireless microphones like the Yealink VCM36-W, you can extend pickup range for bigger rooms and ensure crystal-clear communication for all participants.
6. Does Yealink MeetingBar support wireless content sharing?
Absolutely. With the Yealink WPP30 dongle, you can share presentations and screens wirelessly without needing extra cables.


